Positive vs Negative gamma regime
Distinguish the two regimes by behavior, not just sign — and adjust your bias accordingly.
Two regimes. Two completely different sets of probabilities at the same price levels. This lesson is the practical synthesis.
Two regimes, one chart
You already know the mechanism from Lesson 5. Above the Flip, dealer flow magnetizes — dampens moves, holds ranges, fails breakouts, rewards mean-reversion. Below it, flow accelerates — amplifies moves, extends trends, eats walls, rewards momentum.
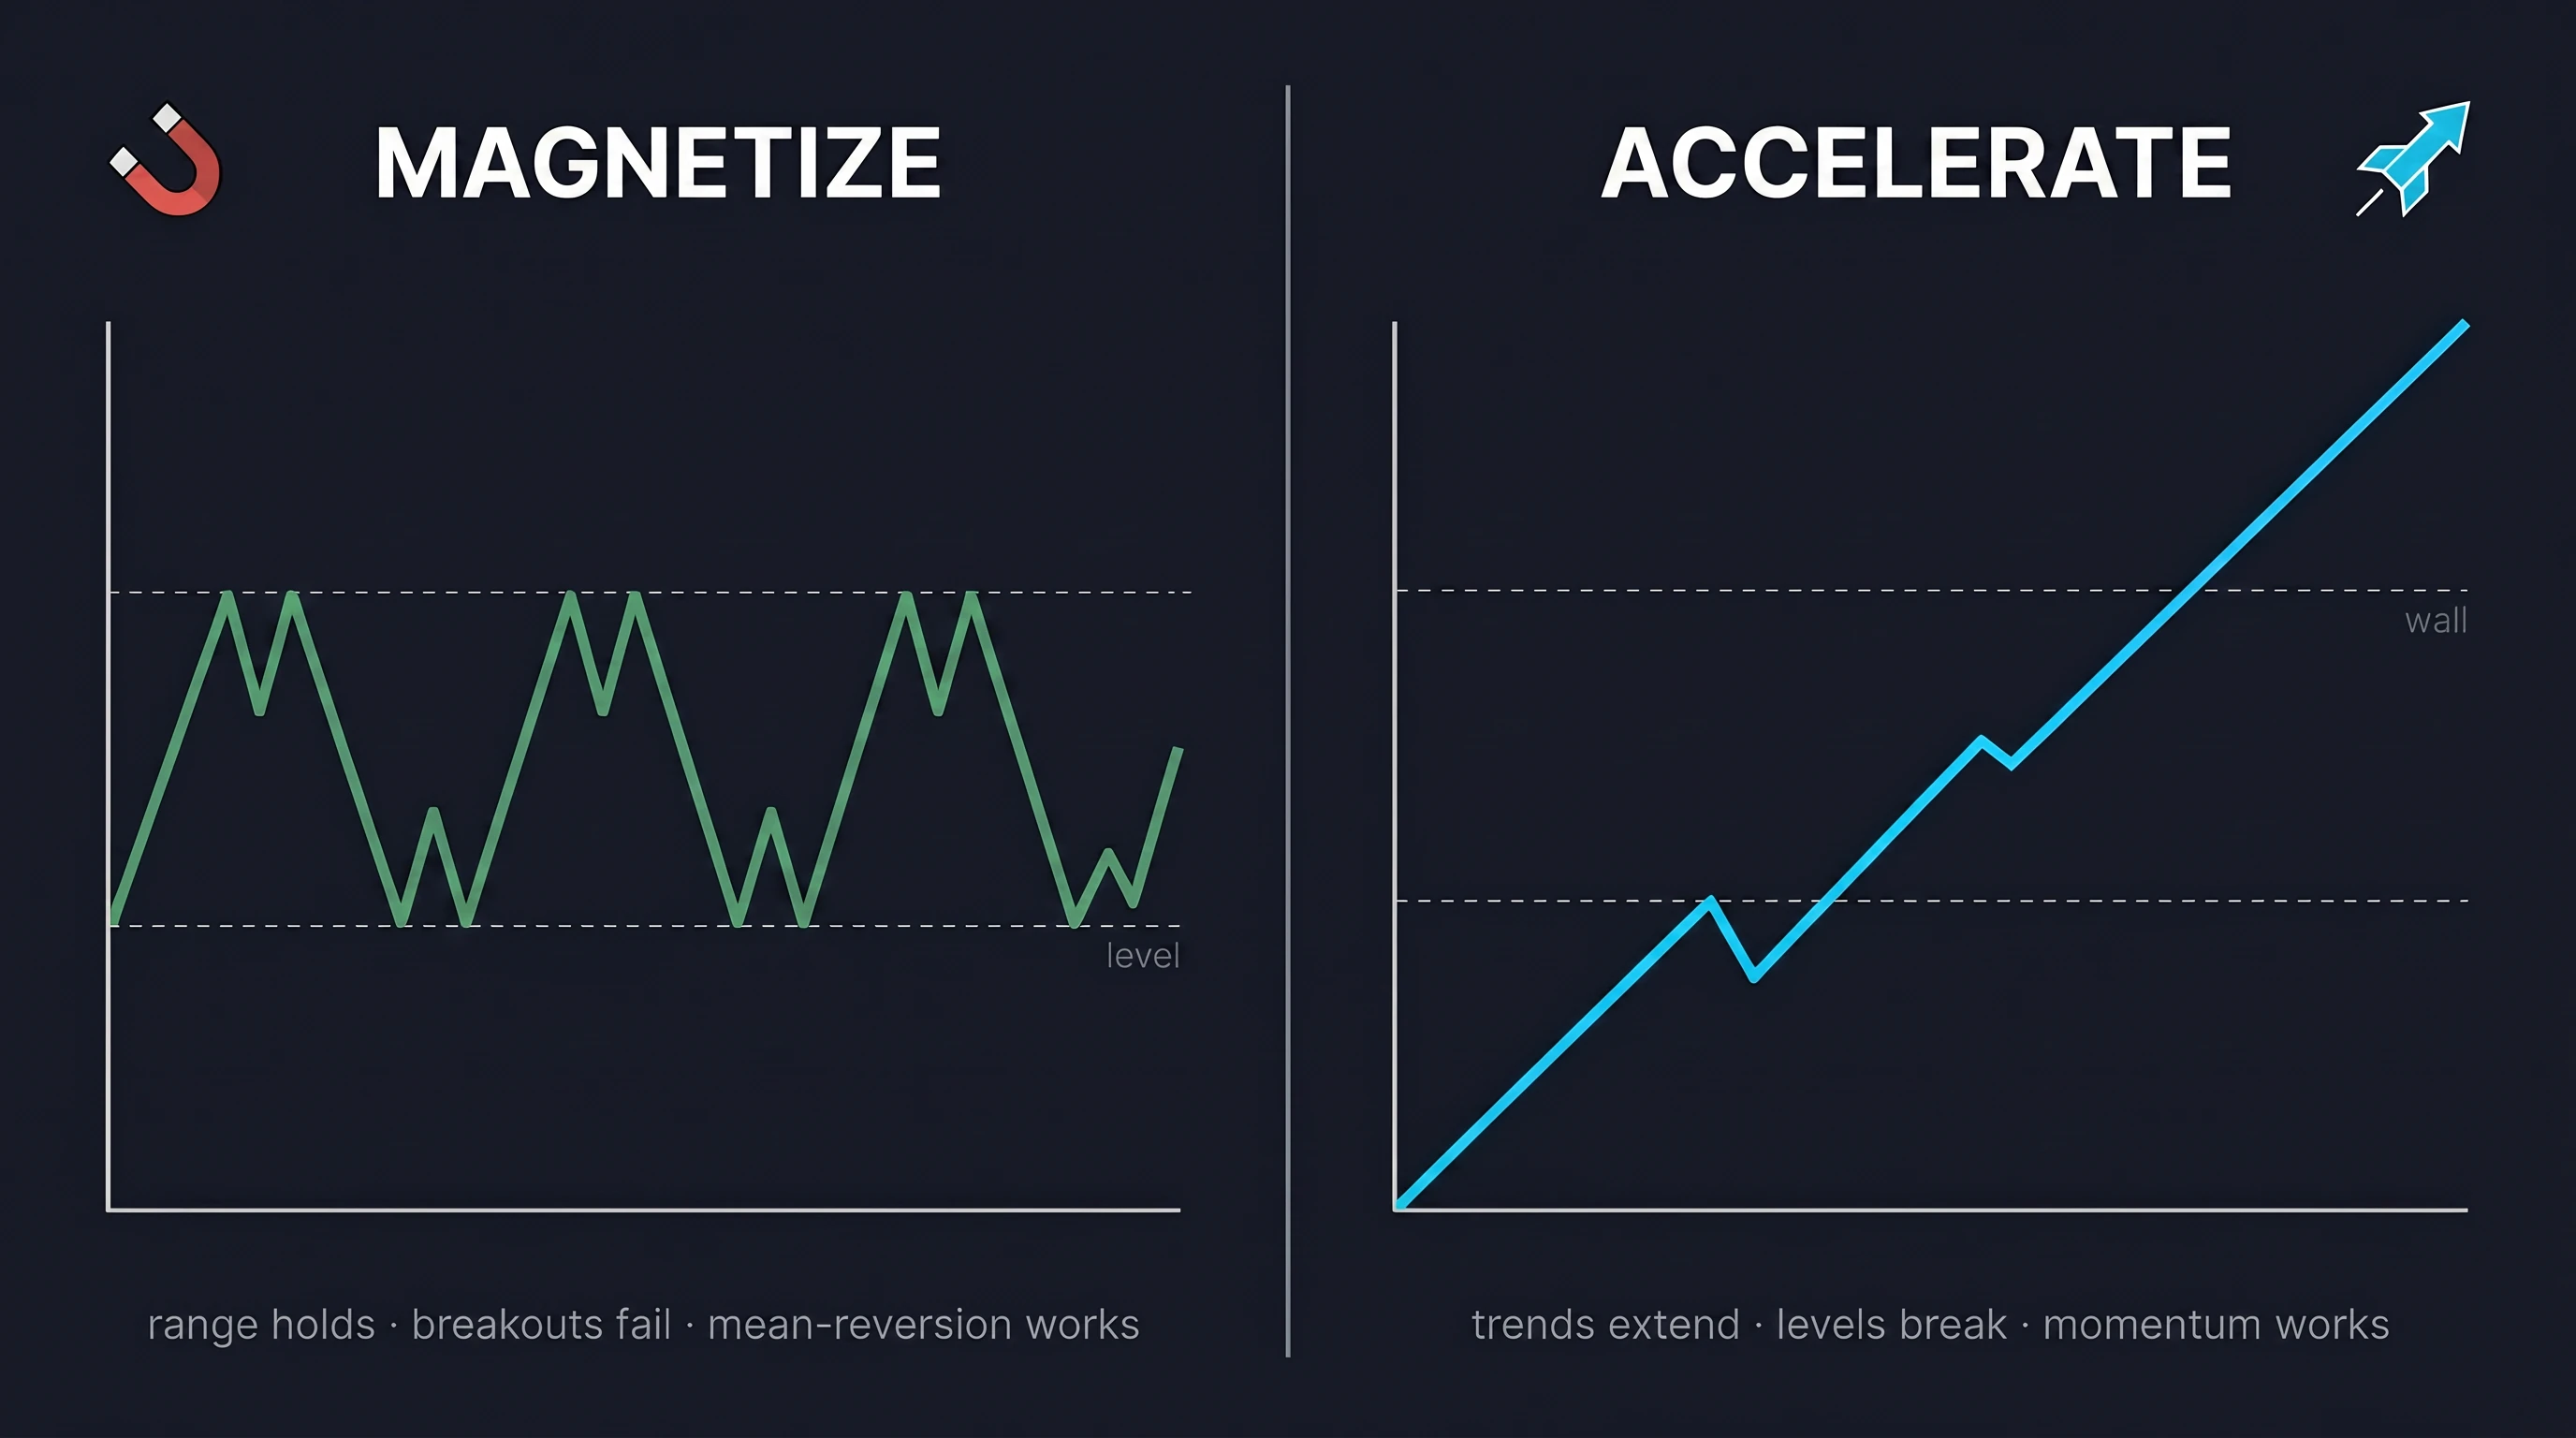
Same dealer book, opposite hedging direction depending on which side of the Flip price sits on. This lesson is about translating that mechanism into how you read any specific level.
Identifying regime in 5 seconds
You already know the test from Track 1. Now use the mechanism behind it:
- Where is price relative to the Flip? Above → positive (magnetize). Below → negative (accelerate).
- What's Net GEX doing? Strongly positive confirms the magnetize regime. Strongly negative confirms accelerate. Near zero is brittle — reduce conviction.
The combination matters. Price barely above the Flip with a near-zero Net GEX is structurally weaker than price 5% above the Flip with strongly positive Net GEX.
How the same level reads differently
Take a tall positive bar at $98,000.

In a magnetize regime (current price $96,000, Flip at $94,000):
- $98,000 is a high-probability stall zone
- Price approaching it tends to slow down or reverse
- Take-profits at $98,000 are structurally supported
- A short into a touch of $98,000 has dealer flow on its side
Now hold the chart constant — same $98K bar, same $96K spot — but the Flip Point has migrated upward overnight. Suddenly that bar sits above the Flip, in destabilizing territory. The bar didn't change; its mechanical meaning did.
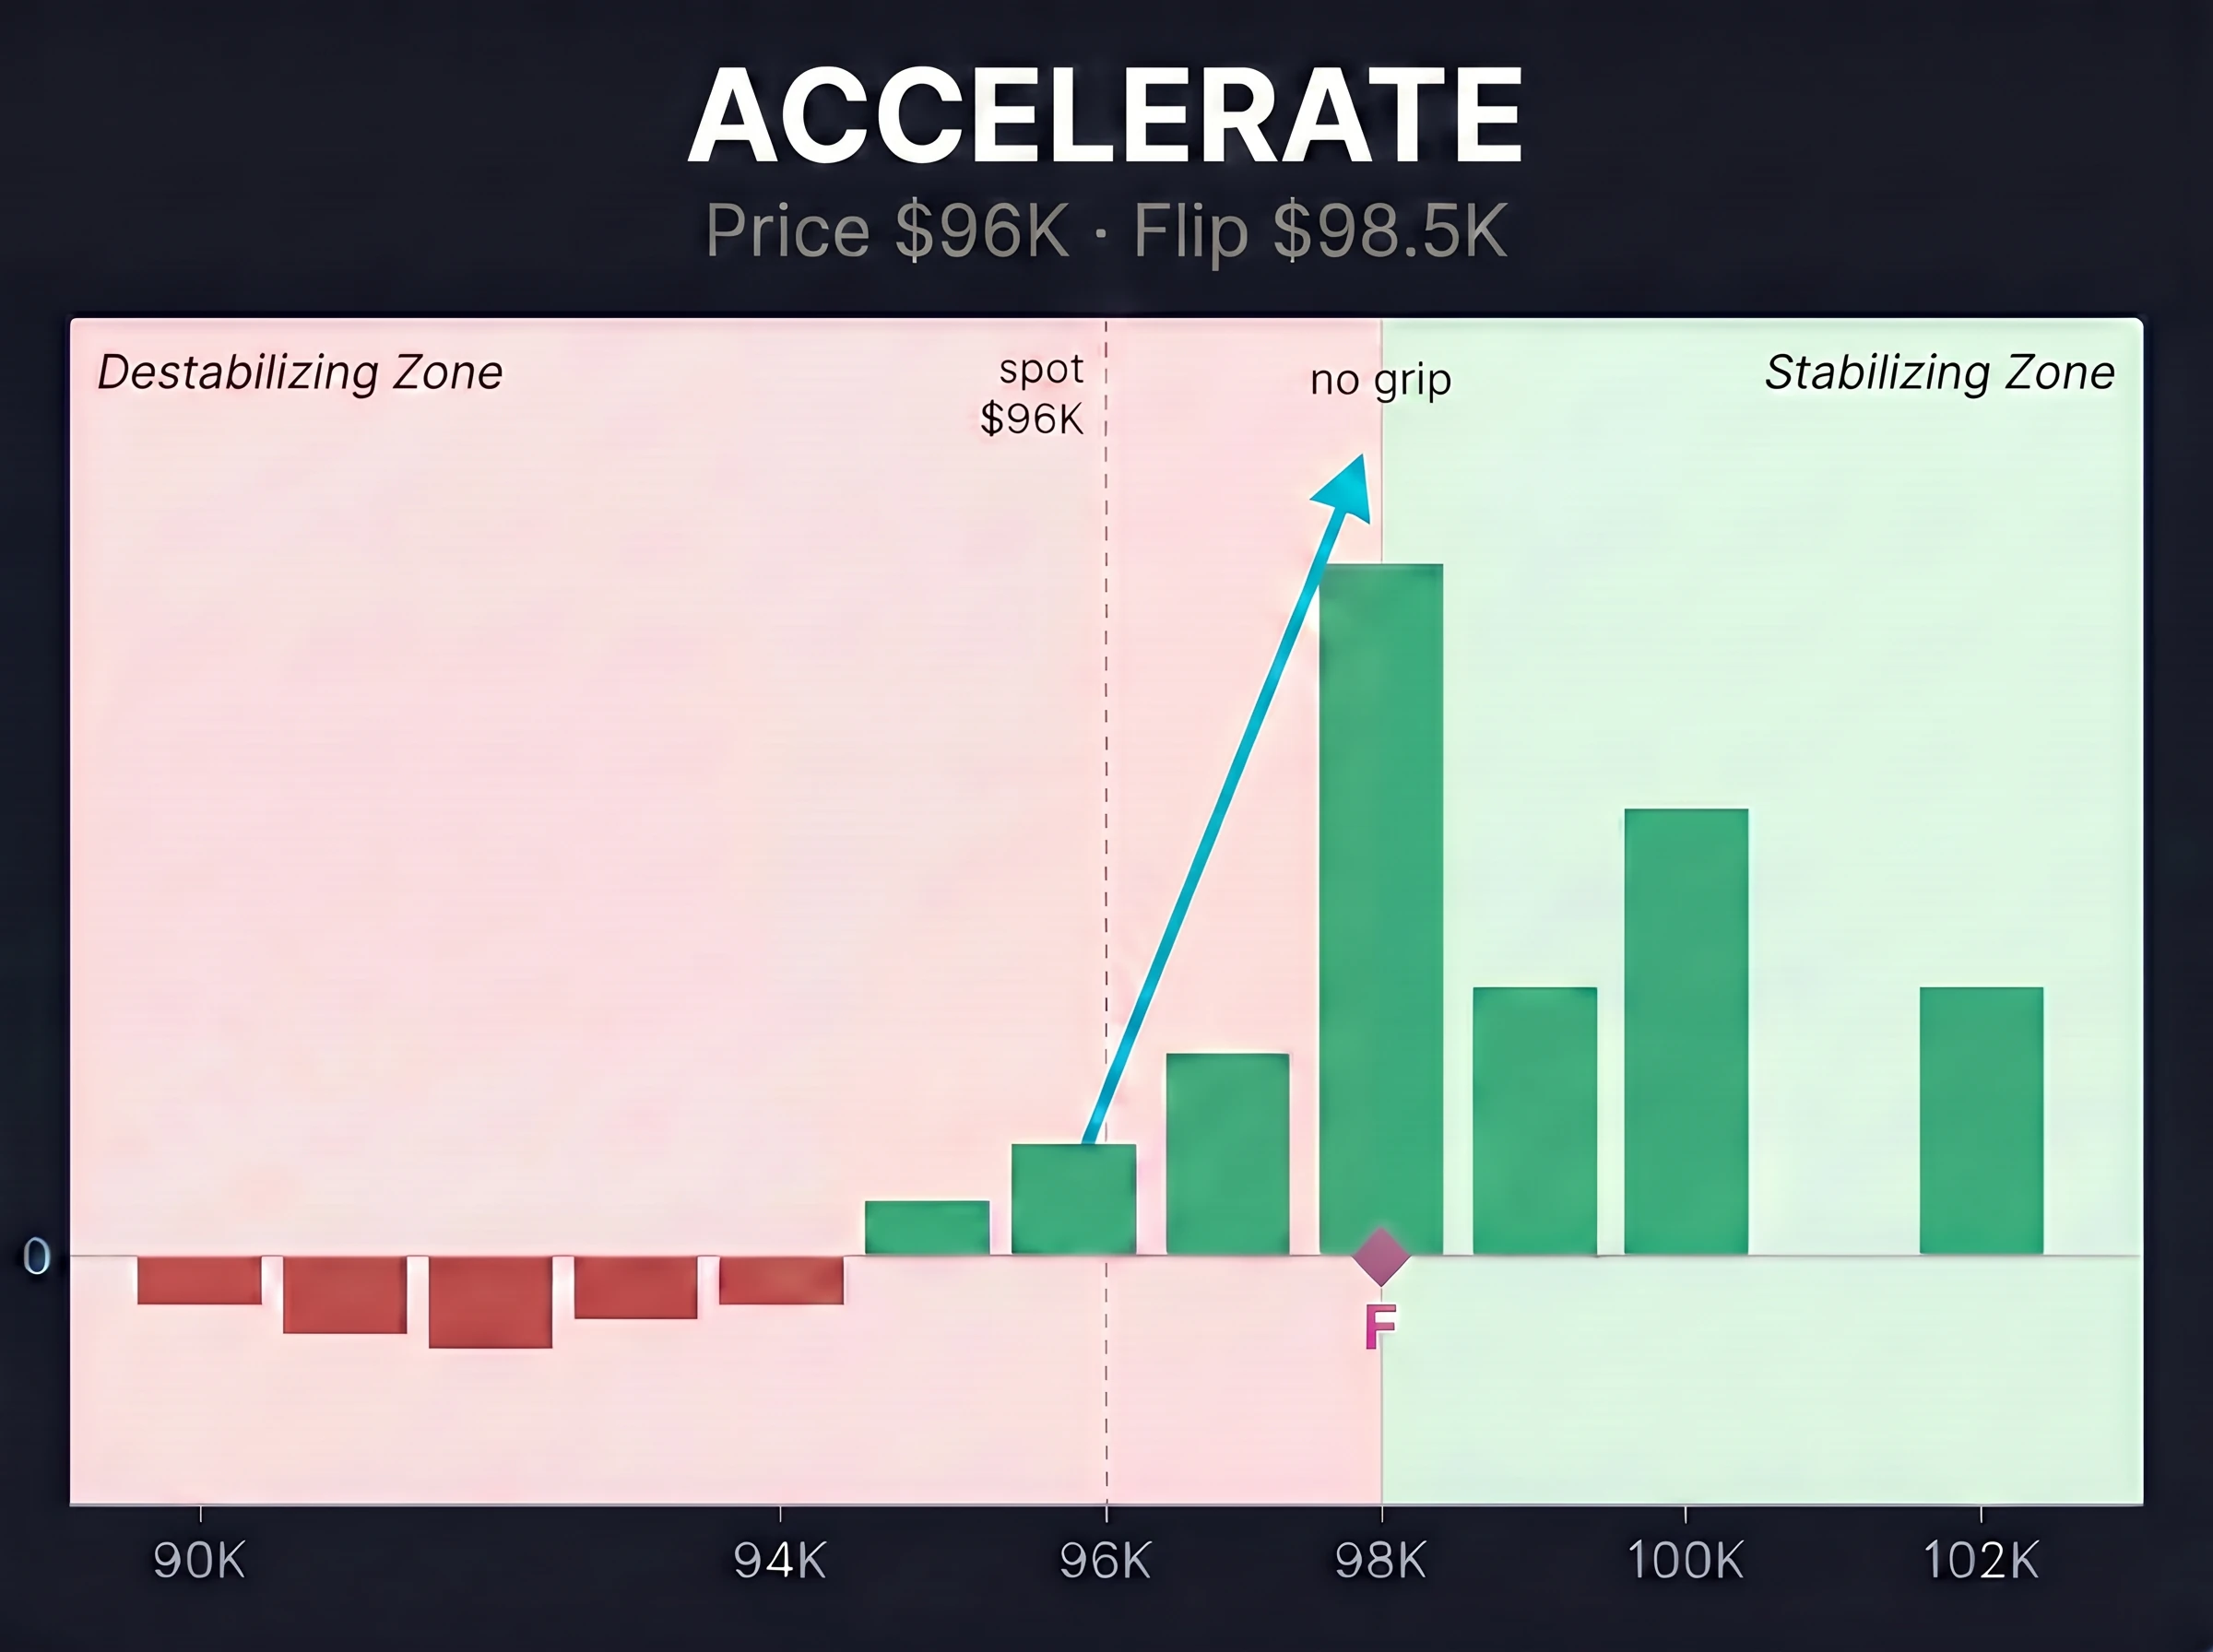
In an accelerate regime (current price $96,000, Flip at $98,500 above):
- $98,000 sits in the destabilizing zone — the Flip at $98,500 is just above it, too close to provide structural support
- The big positive bar is less reliable as a magnet because the broader regime is amplifying
- The bar offers no grip — without structural support from the broader regime, it doesn't hold; price punches through on a momentum impulse and the move extends
- Mean-reversion shorts at $98,000 are fighting the regime
Same bar, same strike, opposite trade structure.
Why regime trumps level
Most retail traders draw lines and treat them as gospel. "$98,000 is resistance because it was resistance last week." That's static.
Dealer flow is dynamic. The question isn't "is $98,000 resistance?" — it's "given today's regime, what does dealer flow do at $98,000 if price gets there?" That answer changes daily.
This is why you'll see the same level act as bulletproof resistance one week and slice cleanly through the next. The line on the chart didn't change. The regime did.
Adjusting bias by regime
A simple rule of thumb:
| Regime | Default bias | Avoid |
|---|---|---|
| Positive-gamma (magnetize) | Fade extremes, fade breakouts, take profits at walls | Chasing |
| Negative-gamma (accelerate) | Follow trend, treat walls as targets, ride momentum | Mean-reversion |
| Near-zero / transitioning | Reduce size, wait for the next clean signal | Aggressive entries |
This isn't a trade system. It's a structural bias filter. Apply it on top of your existing setup process and you'll filter out the trades that are fighting dealer flow.
The takeaway
The two regimes are mechanically different — same dealers, opposite hedging direction. Same level, opposite trade structure. Get the regime right and your level reads sharpen automatically.
Next lesson: Max Pain — the most-talked-about, most-misused signal in retail crypto options coverage.
Regime first, level second. Same wall, opposite trade.
Check your understanding
In a positive-gamma regime, you spot a clean breakout above a major P1 wall. What's the structural read?
Suspect. Positive-gamma regimes resist breakouts — dealer flow leans against the move. Most apparent breakouts in this regime fail or get rejected back inside the wall. Demand strong follow-through, ideally a regime-change confirmation, before treating a P1 break as real.
Same situation, but Net GEX is strongly negative and price is below the Flip. Now how do you read the same break?
Take it more seriously. Negative-gamma regimes feed breakouts — the same hedging that resisted the move in a sticky regime now amplifies it. A clean break above a level can compound into a real run rather than a false move.
Why does 'regime trumps level' matter for trade entry?
The exact same chart pattern at the exact same price level has opposite expected outcomes in the two regimes. A mean-reversion entry that has 70% structural support in a positive-gamma regime can have 30% structural support in a negative-gamma regime. The level is the same; the dealer flow around it is opposite.